You already have a website. It might be a landing page built in Framer or Webflow, a documentation site, a WordPress blog or a single HTML file. What you don't want is to rebuild it around a shop just to take payments, or to send every buyer to a different site at the exact moment they decide to pay. You want to add a checkout widget to your website and leave everything else as it is.
This guide explains what an embedded checkout is, how it compares with a hosted store and payment links, how it works behind the scenes, and how to set one up with PapelShip, from the first product to the first test order. It finishes with the details that decide whether buyers actually complete the purchase.
What is an embedded checkout widget?
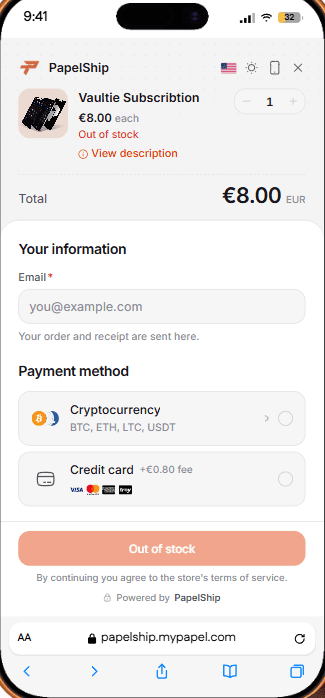
A checkout widget is a payment window that opens on top of the page a visitor is already reading. They click Buy, choose a payment method, pay and receive what they bought, all inside that window. When it closes, they are still on your page, in the same place, looking at your design.
Behind the window, the payment platform does the work your site would otherwise need a backend for: showing prices and payment methods, processing the payment, creating the order and delivering the product. Your website only hosts the button. It never handles card numbers or wallet addresses, and you don't run a separate store just to sell one product.
PapelShip Commerce released embedded checkout alongside the Web-API in version 3.1. The idea is simple: you no longer redirect customers to another platform to make a sale. The whole payment flow runs inside your own site, integrates with a single line of code and keeps buyers in your design. Underneath, a short exchange happens between your page and the checkout service.
01Clicks a buy button
Product and options set on the button
02Opens checkout over the page
Price, methods and language
03Chooses a method and pays
Card, crypto or bank transfer
04Confirms the payment
Cards at once, crypto on-chain
05Creates and delivers the order
Key or file on screen and by email
Two details matter here. First, the order is created in the same system as a PapelShip store, so it appears in your dashboard, on your Customers page and in your revenue figures like any other sale. There is no second system to reconcile.
Second, delivery is part of the checkout rather than a step you wire up yourself. A paid order delivers its license key, file or subscription straight away. If a product runs out of keys, the order waits, and keys you add later are delivered automatically to orders that are still waiting.
Embedded checkout vs hosted store vs payment links
An embedded widget is one of three common ways to take money for a digital product. They solve different problems, and most sellers end up using more than one.
| Option | Best for | Buyer stays on your site? |
|---|---|---|
| Embedded widget | Existing websites, landing pages and docs | Yes |
| Hosted storefront | A full catalogue on your own domain | Moves to your store |
| Payment link | Sales in chat, email or social posts | Moves to a payment page |
Pick the widget when your marketing site already does its job and you only need a way to pay. Pick a storefront when you have enough products for people to browse, filter and compare; a theme such as Ship even opens its checkout on the page, so a small store behaves like a landing page. Use payment links for one-off deals, custom quotes and sales that start in a Discord or Telegram conversation.
Because all three use the same products, prices and delivery rules, you don't have to choose once and live with it. A typical setup is a storefront for browsing, the widget on the pricing page of your product site and payment links for custom orders. If you are starting from nothing, how to sell digital products online walks through choosing a store first.
How to add a checkout widget to your website, step by step
Setting up the widget takes minutes once your products exist. The order below avoids the most common mistake, which is embedding a button before the product behind it is ready to deliver.
- 01
Create the product and its delivery
Add the product, its variants (for example monthly and lifetime) and what the buyer receives: a license key, a file download or a subscription. Check the delivery settings before you embed anything.
- 02
Enable your payment methods
Connect a card gateway, set up your crypto wallet and add any custom methods such as bank transfer. The widget offers whatever the store offers, so this is where you decide what buyers see.
- 03
Copy the snippet from the embed builder
The embed builder in your PapelShip dashboard generates the exact code for each product, with your store and product identifiers filled in, so you never type them by hand.
- 04
Load the script once per page
Paste the script tag just before the closing body tag, or into your site builder's custom code area. It loads with
defer, so it doesn't hold up the rest of your page. - 05
Mark your buy buttons
Add the
data-papelship-checkoutattribute, with the product it should sell, to any button or link. Clicking it opens the widget for that product. - 06
Test on desktop and on a phone
Buy something inexpensive with each payment method you offer, on a real phone as well as a laptop, and check that the key or file arrives on screen and by email.
<!-- 1. Load the widget once, near the end of <body> -->
<script src="https://YOUR-WIDGET-SCRIPT-URL" defer></script>

<!-- 2. Turn any button into a checkout -->
<button
  data-papelship-checkout
  data-store="your-store-id"
  data-product="your-product-id">
  Buy Pro for €49
</button>How to configure checkout buttons for pricing pages, product families and languages
Each button carries its own settings in data attributes, so one page can sell several products in different ways. That is what turns a single snippet into a flexible checkout. A few patterns cover most sites:
- Pricing pages. One button per plan, each pointing at a different product or variant, so "Monthly" and "Lifetime" open the right price.
- Product families. Point a button at a group of products and let the buyer choose inside the widget, instead of building a picker on your page.
- Localised pages. Set the locale so the checkout matches the language of the page. Buyers can also switch language from the checkout's own language picker.
- Focused checkouts. Hide payment methods that don't suit a product, such as manual methods on a low-priced item where review time isn't worth it.
Beyond the button, the look of the checkout and the invoice that follows is set in the dashboard. The invoice builder controls section order, an expiry timer, fonts, logo style, social links and which payment methods appear. Invoice emails, PDFs and invoice pages use your store's custom domain, and email templates can be customised, so the whole purchase carries your brand from the first click to the receipt.
Which payment methods work inside the widget?
The widget is a full checkout, not a redirect to one. Depending on what you enable for the store, buyers can pay with:
- Card, through the gateway connected to your store, such as Stripe, PayTR or iyzico.
- Crypto, including BTC, ETH, LTC, SOL, USDT and USDC, paid straight to your own wallet. The crypto payment card shows a QR code, copy buttons and live payment status, with network selection for stablecoins.
- Bank transfer and other custom methods, with your own instructions, a reference number for each order and optional payment proof. See how to accept bank transfer and gift card payments.
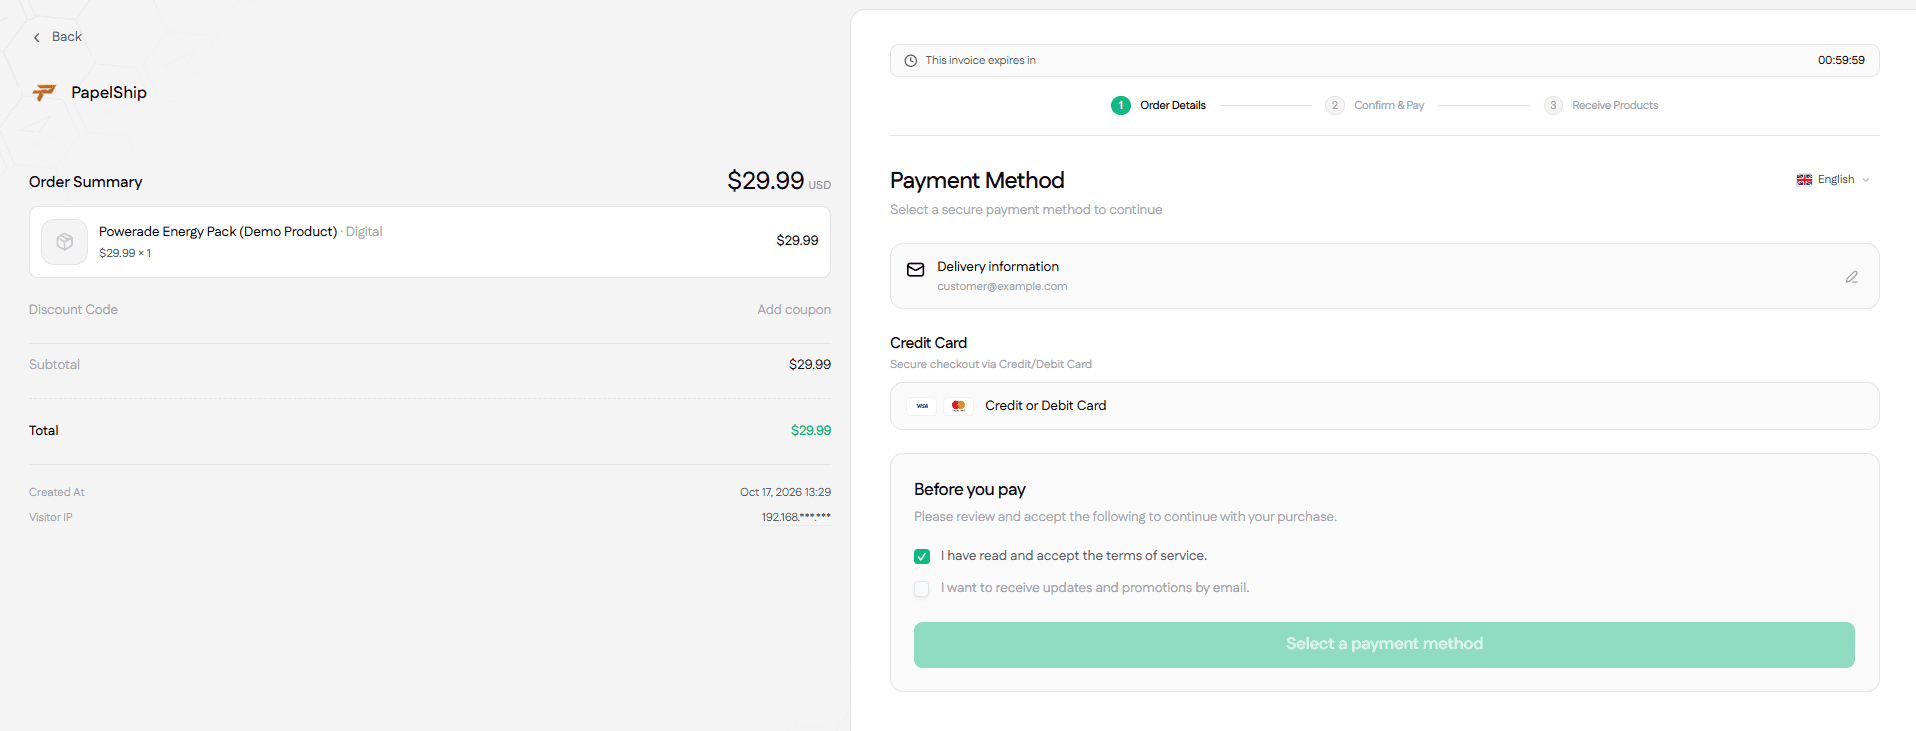
Offering several methods in one window is one of the simplest ways to sell to an international audience. A buyer whose card is declined for a cross-border purchase, or who simply prefers to pay in stablecoins, can finish the same checkout another way instead of leaving. We cover the trade-offs in card and crypto payments in one checkout.
What happens after payment: delivery, invoices and the Web-API
Because the widget runs on the same order system as a PapelShip store, payment and fulfilment are already connected. After a successful payment:
- The payment confirms. Card payments confirm straight away; crypto payments once the blockchain confirms the transaction, which you can follow live on the invoice in your dashboard.
- The order is created and appears in your dashboard, linked to the buyer's record on the Customers page.
- The product is delivered on screen and by email: a license key, a download link or access to a subscription.
- The buyer receives an invoice on your custom domain, in your store's email design.
If your own systems need to react to a sale, for example to create an account in your app, use the Web-API, released together with embedded checkout in version 3.1. Webhooks and API calls keep your systems in sync as payments, licenses and deliveries move through the platform. For community access you may not need code at all: Discord roles can be granted per product variant.
Tips for a high-converting embedded checkout
- Put the button where the decision happens, next to the price and the main benefit, not only in the header or footer.
- Write button text that says what happens, such as "Buy Pro for €49", rather than "Submit" or "Continue".
- Show accepted payment methods near the button, so a buyer who prefers crypto or bank transfer knows before they click.
- Keep names consistent. The product name on your page should match the one in the checkout, on the invoice and in the email.
- Test on a phone. Many impulse purchases start on mobile, and a checkout that is fiddly on a small screen loses them.
- Add guardrails to high-value products. Product security rules can block VPN and proxy connections and limit purchases per customer, and each invoice shows network risk signals such as proxy, TOR and data centre checks. More in fraud prevention for digital goods.
Gyakran ismételt kérdések
Start selling from the site you already have
An embedded checkout is the shortest path from "I have a website" to "I take payments". One script tag, one attribute per button, and every visitor is a click away from buying, without a redesign and without sending anyone away at the moment they decide to pay.
Set up the product and its delivery first, test every payment method on a phone and keep your API key on the server. After that, every sale on your site runs on its own.
PapelShip e-kereskedelmi csapat
Webáruházak és online értékesítés